Bliss
Online Documentation - Last modified: 09. Apr 2014
00. FAQ
How do I change font size & type
Go to Theme options > Choose colors & fonts. There you can change font types,colours and font sizes. Check custom color theme field to make your own color theme
How to add Google Adsense code
Go to Theme options > Advertising. Paste your Google Publisher ID in the first field and your Google Ad unit ID in the second field. Then choose a ad spot that you want to display your Google ads and check the Google Ads field and save options.
How to add Google Analytics tracking code to your website
Go to Theme options scroll down until you see Google Analytics field paste your tracking code in the field and save options.
How to upload a favicon
Go to Theme options find favicon field > click upload > select a favicon(16x16px) that you want to use and save options.
SEO plugin support
Go to Theme options > find SEO plugin support check this to give an SEO plugin control of meta description, title and open graph tags. We recommend using SEO plugin by YOAST.
How to hide search in header
Go to Theme options > Header & Menu scroll to the bottom of the page and find show search in header field uncheck this to remove the search input from the header and save options.How to change blog setup
Go to Theme options > find blog setup Select the layout you want, left sidebar, right sidebar or no sidebar and save options.
How to disable share buttons
Go to Theme options > Post & Pages and find disable share buttons and check to disable the specific share button.
How to enable Facebook comments for posts
Go to Theme options > find enable Facebook comments for posts check this to use Facebook comments instead of regular wordpress comments for posts. Requires a Facebook app id in the field above in theme options.
How to change post setup
Go to Theme options > Post & Pages. In the top of the page you can select the default post setup you want, left sidebar, right sidebar or no sidebar and save options.
How to enable comments for all pages
Go to Theme options > Posts & Pages find enable page comments, check this field to enable comments on all pages as well as posts and save options.
How to display year in post date
Go to Theme options > Posts & Pages find show year in post date field and check this field to display the year of the post below the post title and save options.
How to disable share buttons at the bottom of posts
Go to Theme options > Posts & Pages find disable share buttons at the bottom of posts field and check this field to remove the "Share" button in the post footer and save options.
How to change Icons
Go to Theme options > Posts & Pages. Here you can choose different icons you want to display, and change their colors.
01. Wordpress Installation
Before you start messing things up and making things harder for yourself, you really should take a deep breath and read some of these resources, honestly this will help you, we only care for your well being!
Here's a great video by WooThemes on how to install Wordpress
02. Theme installation
Installing
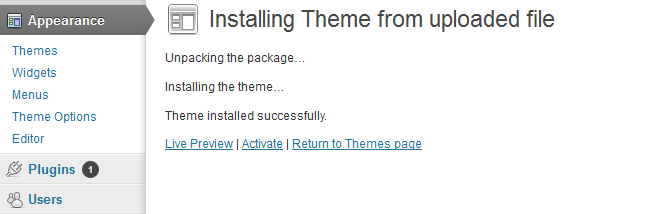
To install the theme use the theme installer in the WordPress administration. Go to Appearance > Themes and click on the tab Install Themes. Choose upload. Click on Browse..., select the bliss.zip theme file and click Install Now.

Activating
After successfully installing the theme click on the Activate button. You can also go to Appearance > Themes and click on Activate were the newly installed theme is located.
Troubleshooting
Open bliss.zip file and unpack all theme files to a directory on your computer.
Using FTP, upload this directory to the /wp-content/themes directory of your WordPress installation on your server.
Go to Appearance > Themes in the WordPress administration and the new theme will appear in the overview of installed themes.
Click on Activate to activate the newly installed theme.
03. Plugin Installation
CF-Post-Formats
It is required that you install the CF-Post-Formats plugin to make the theme work as it should, so there should be a yellow notification box appearing in your Wordpress Backend telling you to do so, if it isn't there, you can go to Appearance > Install Plugins and install CF-Post-Formats and activate it.
Instagram widget performance boost
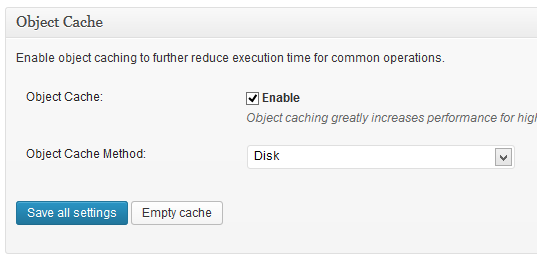
If you are going to use the instagram widget we highly recommend using a plugin called W3-Total-Cache. It is used to cache results from Instagram. The reason for that is to minimize the request to the Instagram servers and improve load times on your site. The plugin allows you to store the data that is retrieved from Instagram on your server and fetch it again and again without having to ask Instagram each time a page is loaded. After you install this plugin go to Plugins > Installed Plugins and click Activate. Then go to the settings of the plugin by clicking the settings link under W3 Total Cache and find an option called Object Cache (see image) and check the enable checkbox.
04. Theme Customization
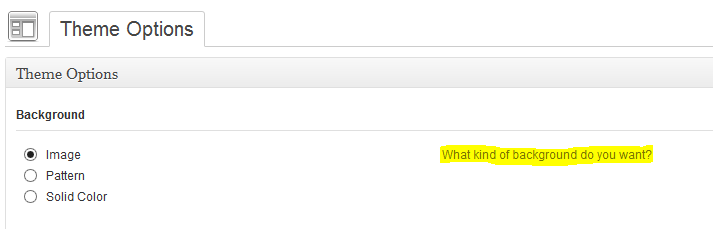
If you navigate to Appearance > Theme Options you will find all of the customization options for this theme. Most of these options are self explanitory but we have provided descriptions for each option displayed on the right side.
If there is anything that you would like to be able to customize just let us know and we'll add that feature.
05. Menu setup
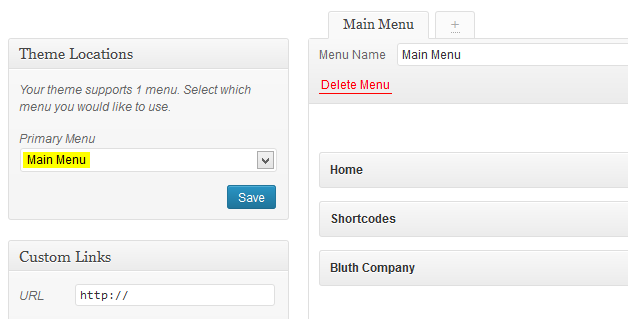
You have to set up a menu for your site, to do that you go to Apperances > Menus and click create menu, give it a name and make sure it is selected in the Theme Location selection. (see image below) The menu will then display in your header in the order you set it up in.
Menu in the Footer or Side bar
You can also create a menu widget and put that in the side bar or footer area. To do that first create a menu in Apperances > Menus and then go to Appearance > Widgets and create a Custom menu widget by dragging it to the side bar or footer.06. Custom Widgets
Your new Theme comes with 6 custom widgets which can be found in your Wordpress Admin Area under Appearance > Widgets, drop the widgets to the sidebar to add it and then customize it to your liking, there are detailed instructions of each widget when there's need for it.

Our custom Widgets are:
- Flickr widget
- Facebook likebox widget
- Tweet widget
- Tabs widget
- Mailchimp newsletter widget
- Social links widget
07. Shortcodes
We've included our custom shortcode plug-in called BluthCodes. To install the plugin go to Plugins > Add New and navigate to the bluthcodes.zip included with your original download, after that you just activate the plug-in and you are good to go! If you have another shortcode plug-in watch out that it doesn't conflict with ours, you should be alright though.
Our shortcodes are:
- Divider
- Social
- Alert
- Label
- Badge
- Well
- Button
- Blockquote
- Tooltip
- Popover
- Accordion
- Progress Bar
We also have column layouts a la Bootstrap
- two_first
- two_second
- two_one_first
- two_one_second
- one_two_first
- one_two_second
- three_first
- three_second
- three_third
- four_first
- four_second
- four_third
- four_fourth
- one_one_two_first
- one_one_two_second
- one_one_two_third
- two_one_one_first
- two_one_one_second
- two_one_one_third
- one_two_one_first
- one_two_one_second
- one_two_one_third
There are buttons for every one of these included in the Editor where you post your pages and posts, click on that button and all the options for each one will be included. You can also check out how to use them on our demo page where there are more detailed instructions
08. Translations
This theme is translatable. The translation files .po/.mo are located in the inc/lang directory in the Bliss theme folder. To translate the theme you have to use a specific translating program like POEdit
Here's a simple video by AJ Clarke showing how to do just that
09. Extras
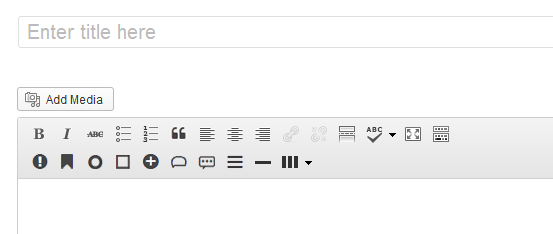
To make an image open up in a lightbox (default on, but if it doesn't work for some reason then this is the way to fix it)
- Insert the image
- Click on the image settings icon (hover over the image)
- Click on Advanced SettingsIn the Advanced Link Settings section put "lightbox" in the CSS Class input field
10. Updating the theme
There are two ways to update your theme to the latest version.
- Wordpress upload method
- FTP method
Wordpress Method
- Download the latest version of the theme from Themeforest
- Unzip the main file to your computer
- In the unzipped folder there is another zip file called bliss.zip, unzip that file as well to a folder of your choice
- Login to your wordpress admin panel and navigate to Appearance > Themes
- First we have to get rid of the old theme and to do that we have to activate another theme
- Click the activate button for some other theme like the wordpress default "Twenty Twelve" theme that comes with wordpress
- After the other theme has activated click the Delete button below the Bliss theme
- Now you can install and activate the new theme like normal
FTP method
- Download the latest version of the theme from Themeforest
- Unzip the main file to your computer
- In the unzipped folder there is another zip file called bliss.zip, unzip that file as well to a folder of your choice
- Open your ftp program like Filezilla and connect to your server.
- If you don't know your login details your hosting provider can help you get them.
- Then navigate to your themes directory usually something like public_html/wp-content/themes/
- Drag and drop the bliss folder you just unzipped from the bliss.zip file to the theme folder on your server
- Filezilla will show a dialog warning you that the files you are trying to move to the server already exist, check the "Overwrite" radio button and also check the "Apply to current queue only" checkbox.
- Click OK and the files will start uploading and overwriting the old ones.
- Login to your website admin panel when uploading is finished and make sure the theme is updated by going to Appearance Themes and checking the version number.